


12 Dec Top Nine Ways to Prevent Water Intrusion
Water is very sneaky. It can work its way in to almost any building. The key to durable, quality construction is carefully designing, installing, and testing the systems that keep the water out.
One of the main reasons for building failure, and subsequent lawsuits, is water intrusion. As part of our Building Envelope Consulting services, we assist project teams in making the right decisions on construction details, material choices, and installation quality. Our ASTM spray rack testing confirms that window installation is correct and will keep water out of the building, assuring long term durability.
In the Southeast, a yearly rainfall of 50 inches equates to a whopping 56,250 gallons of water deposited on an 1,800-square-foot roof – more than the combined volume of three standard-sized swimming pools. Without proper building envelope practices, it’s only a matter of time before a structure begins to suffer from rot, decay, and structural instability. Independent, third party inspections and testing make sure that the structure will keep water out over the long term.
Read on for our nine essential recommendations to make sure water stays where it belongs – outside of your building.
1. INSTALL KICK OUT FLASHING WHERE SLOPED ROOFS TERMINATE AT EXTERIOR WALLS.
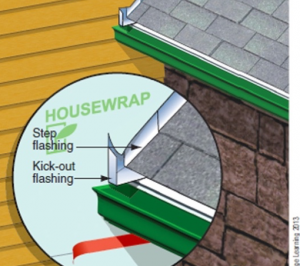
Install kick out flashing where sloped roofs terminate at exterior walls. This often-ignored detail is so critical because when it is missed, the water has nowhere to go but into the wall – pretty much guaranteeing future water damage.
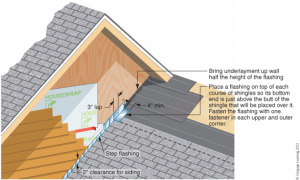
2. PROPERLY SHINGLE LAP HOUSEWRAP 2” HORIZONTALLY AND 6” VERTICALLY WITH SEAMS TAPED.
It is surprising how many installers forget that water flows downhill. Rather than overlapping housewrap sheets with the top layer over the bottom layer, they instead (mistakenly) perform reverse-lapping – with the top layer positioned underneath the one below it – effectively trapping water behind the sheet and funneling it into the structure where it doesn’t belong.
3. HOLD SIDING 1-2” OFF ROOF SURFACE.
By giving the roof a 1-2 inch clearance from the siding, you allow rainwater to flow smoothly off of the roof via a dedicated pathway. This simple technique channels water down the roof and into the gutter, and, of course, off the kick out flashing you installed at the eave.
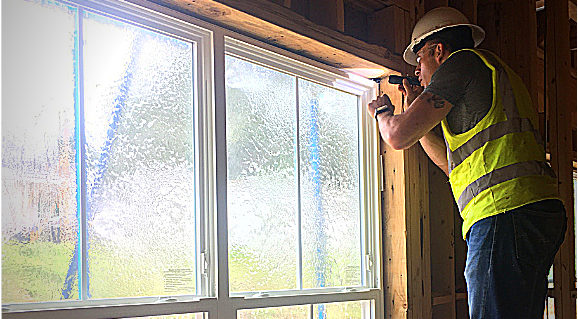
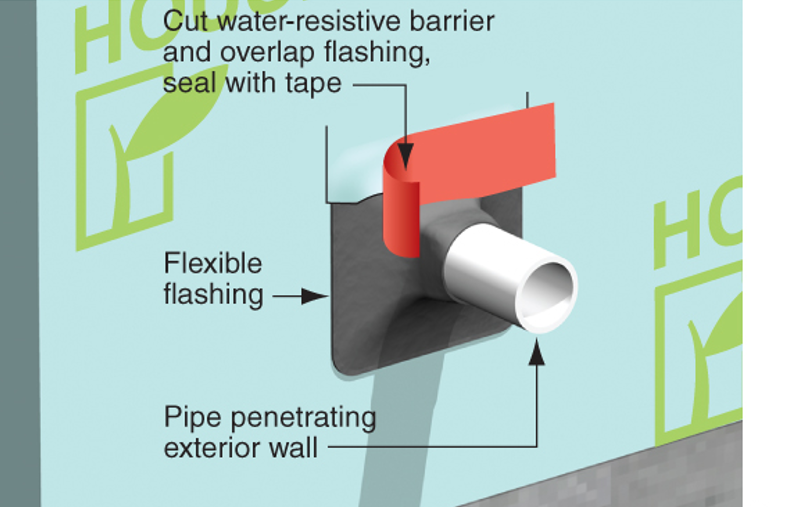
4. PROPER WINDOW AND EXTERIOR DOOR INSTALLATION GOES A LONG WAY.
Install windows and exterior doors properly, following both the window and weather barrier manufacturer’s instructions on installation methods. Carefully installed flashing and sealants will help ensure a long lasting, water-resistant structure. Here’s a helpful guide on window flashing that Home Innovation prepared for the International Code Council (ICC).
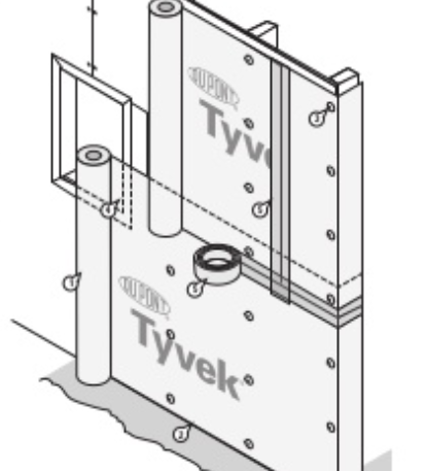
5. INSTALL HOUSEWRAP WITH PLASTIC CAP FASTENERS – NOT PLAIN STAPLES OR NAILS.

Following the manufacturer’s instructions is always a good idea, and plastic cap fasteners are the standard for house wrap weather barriers. Skip them and you’re asking for leaks.
As our friends at Fine Homebuilding put it:
“Caps hold the house wrap and the underlayment better than staples, they reduce the chance for tears in windy conditions, and they protect the membrane from the nose of the fastener installation tool.”
But aside from generally being an effective and commonsense practice, using plastic fasteners may also help minimize the hundreds (if not thousands) of holes that occur with stapling and, in turn, reduce water intrusion into the structure.
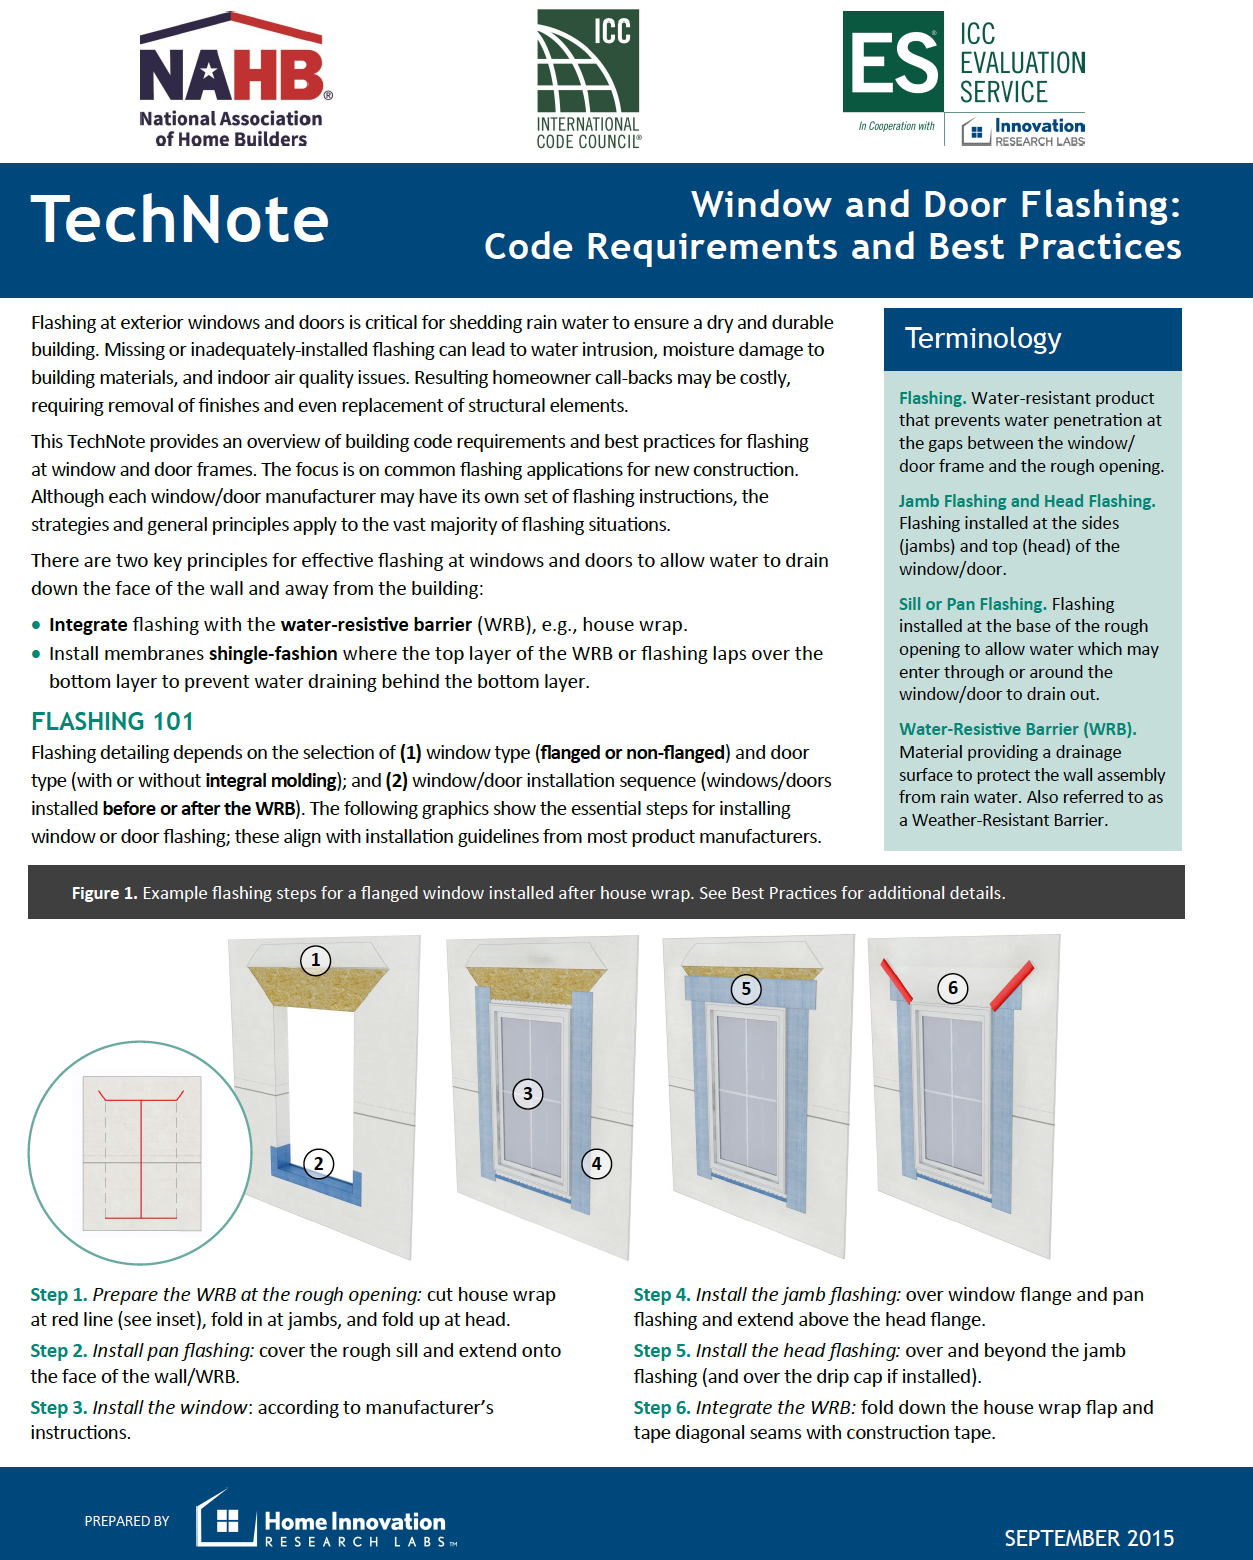
6. IF USING A FACE SEALED SYSTEM SUCH AS ZIP SHEATHING, ROLL OUT TAPE FULLY (NO GAPS OR FOLDS), TAPE OR SEAL ANY HOLES.
Why does this matter? In a face sealed system, the entire wall surface acts as the air and weather barrier and properly installed tape makes sure that the system is working as designed. Gaps and poorly adhered tape allow water and air to sneak inside your building.
Face sealed systems such as Zip Sheathing work well, but like everything, they need to be installed properly.
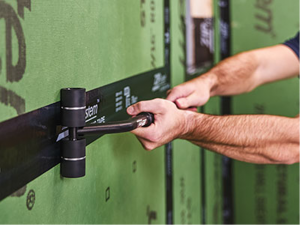
7. SEAL PIPES, WIRES, & DUCTS TO WEATHER BARRIER WITH FLEXIBLE TAPE OR MANUFACTURED GASKET BEFORE INSTALLING SIDING OR MASONRY VENEER.
This is a timing issue. Builders are often in a rush to start installing siding to meet a draw schedule or make their client happy, but when you start siding too soon, every hole drilled later for pipes, wires, and ducts is a leak just waiting to happen.
8. INSTALL A VENTED RAINSCREEN TO REDUCE MOISTURE AND VAPOR INTRUSION INTO THE BUILDING AND EXTEND LIFE OF THE SIDING.
Vented rainscreens allow water that always works its way through the siding to drain out instead of drawing it into the structure. In addition to water, they also help manage vapor that may otherwise be driven into the structure. With even the best weather barrier, water can be drawn into the structure through capillary action. The space a vented rainscreen provides allows any water that gets past the siding or masonry (and it always does!) to drain down and out, allowing the weather barrier to do its job.
9. DO A COMPLETE INSPECTION OF THE WEATHER BARRIER BEFORE STARTING ANY SIDING INSTALLATION.
After all the flashing work is complete, do a thorough walk around and think like water – look for ways that you could sneak into a building. Any gaps you find need to be corrected before they are covered up. You can also test windows and doors for water infiltration, seal quality, and proper installation.
SK’s comprehensive building envelope consulting and testing services measure overall performance and provide durability assurance. From early design to mid and post-construction, we help target areas of improvement in your structure’s exterior – such as as air leakage levels, air/vapor barrier integrity, insulation performance, and energy efficiency.
Our core services include plan reviews, inspections, and testing – focusing on water penetration resistance, water vapor mitigation, and improving thermal performance.
Properly water sealing a building isn’t brain surgery, but it takes effort to do it right. Select the right materials, install them according to the instructions, and inspect the workmanship. In turn, you will be rewarded with a high performance, low maintenance project that will withstand time and the elements.
![]()
Get a printable, at-a-glance list of these top tips for preventing water intrusion.
Matt Hoots
Posted at 17:20h, 17 DecemberLooks good- thanks for sharing